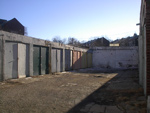
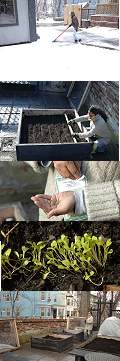
I started my prototype Urban Sustainable Living Garden here in 2003. The garden is designed with 3 things in mind
1. Maximizing growing space,
2. Making it inviting, and
3. Designing it to fit the urban landscape. The buildings you see here were put up as garages in the early 1917s to house cars. Thats exactly what it was for around 70 years. By 2003 when we purchase the property, Luther had run the business since the 1960s. So the recent renovation was the end of an era. The lengthy renovation of the center building now houses my multi media production company,
FilmShack, Inc. and non profit, Tell Stories, Inc.
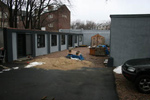
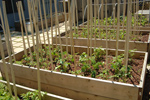
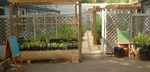
I thought this would be the perfect demonstration farm, as it is about the same size as the average three deckers back yard at 20x 50. The garden has 124x8 raised beds and 34x4 raised beds. Ive
also included an arbor and seating are so that I can enjoy the garden with others. . I believe that all gardens need seating areas designed into them, that way the garden truly becomes an inviting outdoor experience. The more time spent in the garden the better it is for you and the garden, you will find yourself spontaneously tending and nurturing it.
I added concrete pavers which add to the urban industrial look. They are functional and I am a big believer of trying to get construction materials that are as cost effective as possible. When you are undergoing any renovation project, there are always unexpected costs that are beyond your control. The material costs are however completely under control. Keeping that in mind you dont want to necessarily use the cheapest materials i.e. having to use 3 or more coats of paint due to the poor quality of paint can cost you more in the end.
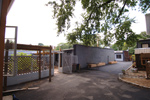
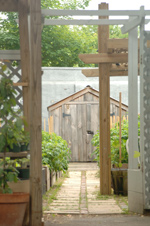
The garden thrives behind its Japanese, Rashoman inspired gates. In the winter the garden beds act as compost bins. I always think of Joni Mitchells song Parking Lot when I look at it now. To go from cars to offices, school and garden, thats my humble bit of urban renewal. The garden takes its design inspiration from the medieval and the monastic gardens of Europe and North Africa, with some good old fashioned New England Cottage gardening thrown in for good measure.
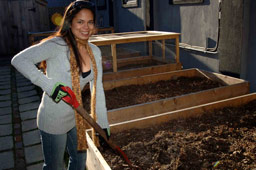
The organic gardening system I use is a bio-intensive, permaculture stacking design. Every thing is built modularly, so the animal cages, trellises and hoop house all fit standard in each raised bed. Here I can grow tons of garden vegetables for my family and friends with plenty left over to sell to the neighbors. The shed I have in the back is a 10x12 shed from JamaicaCottages.com. Domenic the owner gave us a great deal on all the sheds on the property. He does such great work using good looking materials.
Indoor Gardening
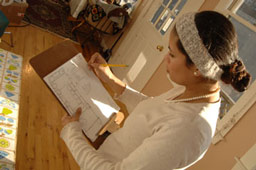
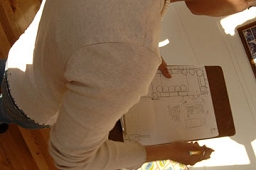
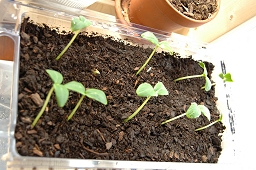
I began by taking over a small section of my house, the sun porch, and dedicating it to the indoor garden project for apartment dwellers as well as for the seedling factory for all my outdoor garden beds. This part of my house is south facing and gets pretty good natural light. I wanted to capitalize on the natural light so all the shelves in this area are up off the floor about fourteen inches so that as many shelves as possible can get the direct sunlight. I use the extra space for storage. I use graph paper for most of the planning. Its great because you can easily create a scale and then a floor plan. I measure the room and the space
and then I draw out my ideas. At this stage it is easy to change my mind; I can simply erase it and start over. By creating a design on paper I am able to go to catalogues and websites and make sure anything I need will fit and work in the space.
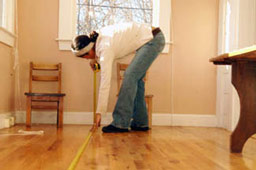
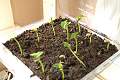
My sun porch is south facing so I know that I want to use the free energy from the sun as much as possible, and I design my indoor garden space accordingly. Because I plan on buying everything off the rack it is important the drawings are accurate to at least the inch. This area is 13 by 6, which gives me plenty of space for my seedlings. I have to say, I went a bit crazy and started over 1200 seedlings in this space and help plant not only my own garden, but a bunch of my neighbors gardens as well.
With all projects remember to start at the bottom and work your way up. I had an old wooden table which will be the base for my shelves and some chairs so I sanded them down and shellacked them. Remember to reuse and recycle whenever possible. Shellac is my favorite finish. It dries faster and sands easier than polyurethane and its renewable. It is made from insect secretions that are mixed with alcohol. When the alcohol evaporates, a natural, super tough finish remains. The main reason I put a finish on the tables is because I don't want to stress out if water or dirt gets on it, and it makes any clean up of future spills much easier.
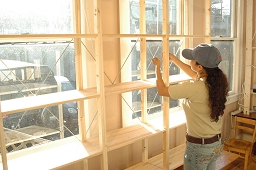
Next I set up the shelves I bought off the rack from the Swedes. After pricing out the cost to build shelves, it was cheaper to buy the shelves than make them from scratch. I find that off the rack shelves can be a bit on the rickety side so I add some extra hardware so it can handle the weight I put on them. I secure the shelves to the table tops using my screw gun and L brackets and then I add wing nuts to hold the shelves together. My cat "Dirt" approves. I then set up the Flo tubes which I install over the shelves.
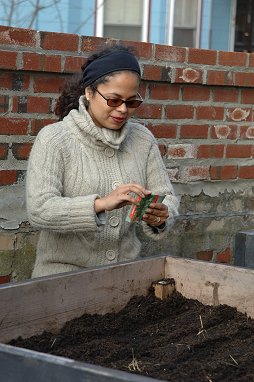
I use what I call the bucket method for handling soil. I have found that potting tables and benches get dirty and become a pain to clean up after, so a few years ago I bought a galvanized tub which I use for all my potting needs. I simply put both the containers and the soil into the bucket. This method of mine is super fast and leaves virtually no mess, I highly recommend it. I don't think its necessary to use products made for seed starting. I like to recycle containers out of my kitchen and I start my seeds in those.
I also started seedlings in a closet storage container. I love this style container because it works like a mini greenhouse and within 48 hrs I already had sprouts!. It is important to remember to have water on hand; I keep ten gallons of water on a wheeled cart on stand by. It is much easier than walking all over the house to get the water and besides municipal water isn't great for your soil. Common water treatments kill the bacteria in your soil that is critical to the plants survival, so I let the water stand at least over night. The other advantage to this is that the water is at room temperature and it won't shock the little baby roots as they form.
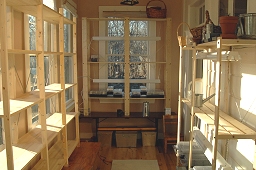
The indoor garden is complete, and already up and running. My total costs for this project was around $168.00 less than half for what it would cost if you bought a system from one of the large manufacturers.
This system produced a total of 1200 seedlings which I planted in my outdoor garden and sold at my farm stand. I hope you find the video informative and a source of inspiration no matter how much space you have. Watch the videos and pass them along to anyone you think will like them.
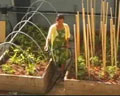
Raised Beds in the City
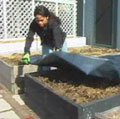
Using raised beds in the city is essential for Urban Sustainable Living. The use of raised beds in my system allows you to maximize your growing space. It also modularizes the garden and brings the garden to you, taking the back breaking work out of gardening.
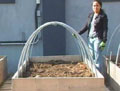
Raised beds are great for people with disabilities allowing them to get outside, be physical without having to go beyond what they are physically capable. Raised beds are essential because in my system they house the chickens that fertilize and til the soil. Raised beds also allow you to extend your growing season by easily creating micro climates using hoop houses or high tunnels.
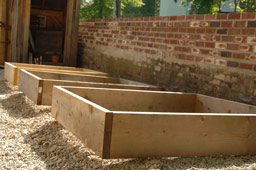
Building a Raised Bed
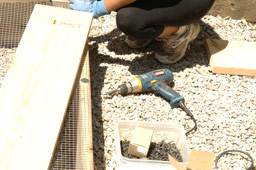
Building a Raised Bed is the first step towards living an Urban Sustainable Lifestyle. There are many different ways and materials you can choose to build your raised bed. Personally I use regular old dimensional lumber. There are advantages and disadvantages to this material. The advantages are that it is relatively inexpensive, easy to cut and screw together. The disadvantages are that because the lumber is in contact with the soil, will eventually rot away. If I get seven years out of a bed then I am happy. I extend the life of my beds by painting them with milk paint after they have been outside for one year. I have also treated some lumber with linseed oil with pretty decent results.
Never use pressure treated wood. It has been chemically treated and those chemicals can leach out into your soil and poison you slowly. I am dying to try recycled plastic lumber for my beds at some point, recycled plastic lumber, although more expensive it can last virtually forever.
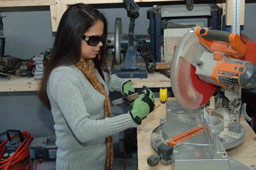
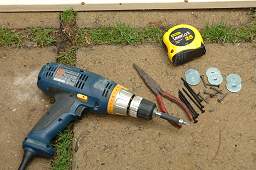
The tools you will need are a Screw gun and a saw. I personally get the people at the home supply store to precut my lumber for me, it is easier to transport that way and saves me lots of time. The raised beds I build are based on four foot beds and eight foot beds; this is also the general standard for lumber. Lumber comes in 8, 10, and 12' + lengths, so this allows less cutting, which means less waste. I use 2x10x8' lumber for the construction of my raised beds. To build one 4x4 raised bed I buy four pieces of 8' lumber and have the store cut them into 8-4 pieces. Theyre now lighter and youll be able to transport them home easily in your car. Dont forget to buy 4galvanized screws to assemble the raised beds. If youll be rotating and housing chickens or rabbits in them, make sure you fasten galvanized wire to the bottom with screws and washers so your chickens will be safe from predators.
Each four foot bed requires about 32 cubic feet of soil. Today you can buy highly enriched organic soil at your garden center, but I prefer to make my own with my livestock and other compostable materials that would normally be hauled away. Check out the video for more information, and get on building that raised bed.
Lawns to Edible Landscapes
It’s time to transform America’s lawns into green landscapes. It really hit me on a recent trip to visit my family in Florida. All over the West Palm Beach area there were signs detailing the
town rules during the drought they were having and when you could and couldn’t water your lawn. I also saw all of the beautifully manicured housing developments and Golf Courses being watered. It all really bothered me. There had to be another way. I put my head around it and out of that came this video. Please watch and find out my solutions for America’s unhealthy obsession with lawns.
Composting and Vermiculture
The compost bin I use in my video is the easiest and inexpensive type to make. Just purchase galvanized metal 4 feet tall by 5 feet long. I’m using a ½ inch mesh 19mm galvanized wire. I make a cylinder with it and attach the ends with the wire that is used and comes with the roll. It’s light weight so I can place it any where I need it on my lawn. I start filling the compost bin with all of the leaves that are around it on my lawn. What a great workout! I want to make sure that I include only leaves, pine needles, and small twigs. Large branches won’t compost as fast as the leaves and weeds may contain seeds that are not wanted in my compost... Kitchen scraps may attract unwanted pests. As the winter goes by the leaves will begin to decompose and turn into compost. As that happens I can continue adding more leaves. In a few months I can pop off the wire and spread out the compost on my lawn. It’s the perfect addition to kick start my lawn or garden in early spring. There are different types of compost bins you can make. Check out 2 other types I have around my house.
The problems I encountered when I first started out in gardening, in retrospect, can all be traced back to my lack of understanding of the soil and the biological processes going on inside. Rodale said it best in the 1930’s, healthy soil=health plants=healthy people. Controlling and understanding these processes which happen at a microscopic level doesn’t require a degree in bio chemistry. The process are totally natural and to some degree spontaneous. What it requires is lots of organic material, leaves, manure, anything.
The easiest thing to do is to create you own home compost system. There are many ways to compost organic material, and here is one of them based on the 4’ x 4’ construction model. This
particular system is designed to also act as my main vermiculture factory, where hopefully I can breed thousands of composting worms. The idea is to get the bin to serve the garden it too useful ways. One, make compost so that I can fertilize and enhance the soil throughout the farm. The other is to create worms as supplementary feed for my poultry and aquaculture projects.
Worms are the true engine of my farm. I use “red wiggler” worms that I get from the Cape Cod Worm farm and Maggie Pipkin(www.capecodewormfarm.com). The worms rapidly break down the organic matter and turn it into nutrients for the plants that are readily acceptable to the plants as they grow.
The R2D2 factory I have built here are my standard small size garden beds stacked on top of each other. I installed simple 2” x 3” supports in the corners. I have left a gap between the boards so the compost has access to oxygen. I placed a second hand skylight on top so that I can regulate the heat and humidity easily.
At the bottom of the bin I installed hinges and latches so that when the compost is ready I can flip up the bottom and rake out the compost. Hopefully “compost crank” will send me a crank so that I can stir it up frequently (hint...hint).
Vertical Gardening
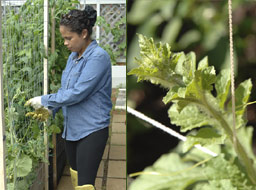
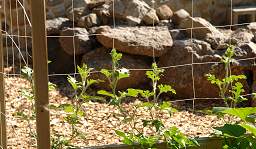
Vertical gardening is a must in order to maximize your growing space when growing vining plants. Cucumbers, watermelons, pumpkins, and grapes all can be grown in small spaces by planting them along
a fence, an arbor, or building a support yourself like the one featured in my video. My in-laws in New Hampshire grew watermelons a few years back and they were some of the best watermelons I ever tasted. From then on I was determined to grow watermelon in the city. The best types are sugar baby or any small ice box (refrigerator) size watermelon variety. Cucumbers, watermelon and pumpkins are all susceptible to wilt which can kill the plant before fully fruiting. There are a few things you can do to try to prevent your plants from dying, but none of them fool proof. Another neat idea is to transform a chain link fence you have. I’ve incorporated chain link in my garden with great results.
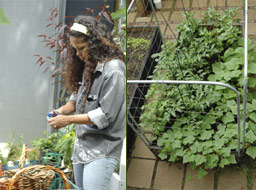
So many of us in the city have chain link fences. What better way to make them beautiful and useful than to grow juicy grapes. I lived in Los Feliz, CA for 6 months and the back chain link fence had a beautiful and prolific collection of grapevines. Grapes don’t fruit in the first year, but you can use the grape leaves for a wonderful Greek inspired meal. Greek neighbors of mine bring their parents to pick grape leaves and make fresh authentic Mediterranean dishes. Watch my videos on vertical gardening and
let me know what you think.
Winter Gardening
Because I live in the northeast, the growing season is only from late April to early October (lately into November). Using raised beds allows me to extend the growing season using modular hoop houses to create micro climates around the plants maintaining ideal growing conditions for my cool weather crops. You can't just grow anything. Do a little research and check out Eliot Coleman's book Four Season Gardening for more information. Certain herbs like parsley and mint also do really well; and lettuce and carrots thrive in cold weather. In the video, I'm in my urban sustainable garden starting a variety of seeds on a winter day that was pretty warm. In this video I am using a cold frame that I built from a recycled skylight. Check out the video so you can start your winter garden this year.
Organic Insect Control
There are organic ways to control pests in your garden. I present 2 in my video series Organic Insect Control. There are great organic and humane fly traps and I've found one. Video one shows me setting one up in my garden. In the second video I use something called DE or Diatomaceous earth that comes in a powder form and that you dust on your plants. The great thing about this is that it is completely safe for humans and animals.
Shed
The shed is where you'll be organized and if maintained properly any task will be a breeze. In this video I go over how I've organized my bus stop shed. If you're thinking about getting a shed make sure you check your local zoning laws and get the proper permits. Usually there is a maximum square foot amount allowed without a permit. Make it easy on yourself and get all the facts before you purchase a shed. The shed in the video is 4'x4'. It's small and compact; perfect for smaller gardens. I have it in my Urban Sustainable Living Garden which is 500sqft. It gives me a place to put the tools I need when working in the garden and gives me a place to put things out of the rain. Sheds can come in kits. I've found that kits aren't always as straight forward as they may seem at first. My advice is that it's best to buy one and have it assembled by a professional on-site or have one delivered and placed on-site. Sheds are a lot of fun to have and will add value to your property. You can paint your shed or treat it with an exterior wood sealer. I've customized my shed and added places to hang my tools. Take a look at my video and don't forget to sign up for my Ezine.